What is a VI Peel and My Experience with the VI Precision Plus Peel
If you’re struggling with hyperpigmentation, acne scars, or uneven skin tone, you might have come across chemical peels like the VI Peel. These treatments are designed to rejuvenate your skin, addressing concerns ranging from discoloration to fine lines. Recently, I opted for the VI Precision Plus Peel, specifically tailored to treat pigmentation and acne scarring. Here’s a detailed look at the process, how it felt, and my results.
What is a VI Peel?
The VI Peel is a medium-depth chemical peel that helps improve skin texture and tone. It works by exfoliating the top layers of skin, encouraging cellular turnover and revealing smoother, healthier skin beneath. The VI Precision Plus Peel, which I chose, is an enhanced version, specially formulated to target pigmentation issues like sunspots, melasma, and acne scars.
Why I Chose the VI Precision Plus Peel
My primary concerns were:
- Hyperpigmentation from sun exposure and old acne marks.
- Acne scarring that left uneven patches on my skin.
I decided it was time to invest in my skin and address these issues. After researching different peels and consulting with my esthetician, we agreed the VI Precision Plus Peel was the best option for my goals.
The Process: What to Expect
The entire treatment took about 30 minutes, and here’s how it went:
- Cleansing
My esthetician started by thoroughly cleansing my face to ensure it was free of any makeup, dirt, or oil. - Application of the Peel
The peel itself is applied in three layers of acid. With the first layer, I felt an intense tingling and slight burning sensation. It wasn’t unbearable, but definitely noticeable. To help manage this, my esthetician gave me a mini fan, which worked wonders to cool my skin. - Post-Peel Kit
After the peel was applied, I was given a post-peel care kit with detailed instructions. It’s important to follow these directions closely to get the best results.
Post-Treatment: What It’s Like
Here’s a breakdown of my post-treatment experience:
- Days 1–2: Tightness and Dryness
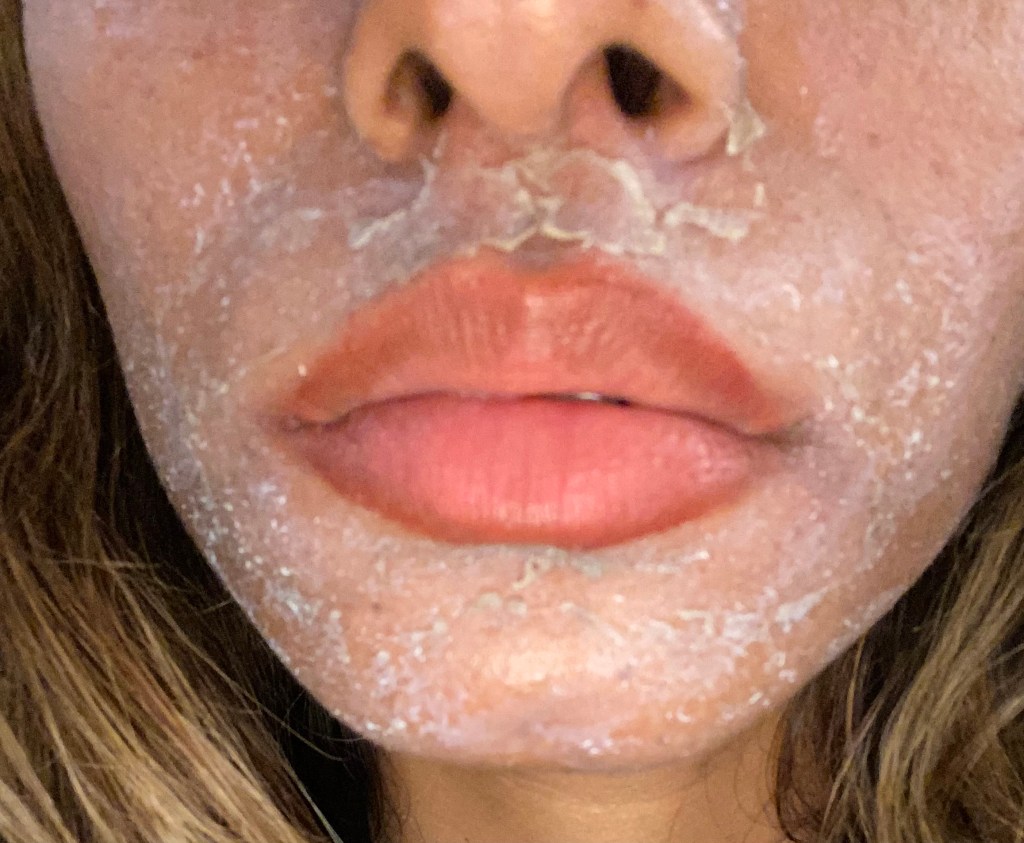
My skin felt extremely tight and dry during the first two days. Active pimples darkened and hardened into small scabs. - Day 3: Peeling Begins
By the third day, peeling started. Some areas peeled more heavily than others, which is normal. My acne scars initially looked darker before the dead skin shed off. - Week 1: Results Start to Show
After about a week, the peeling stopped, and I noticed dramatic improvements. My skin was smoother, more even-toned, and refreshed. Hyperpigmentation and scarring were significantly reduced, and all active breakouts were gone!
Tips for a Successful Recovery
- Avoid Sunlight and Use SPF
It’s best to schedule this peel in the fall or winter, as you need to avoid sunlight as much as possible. Always wear SPF to protect your skin during the healing process. - Follow Aftercare Instructions
The post-peel kit includes specific products to soothe and heal your skin. Don’t skip any steps, and avoid working out or wearing makeup for 5–7 days. - Don’t Pick the Peeling Skin
Let your skin shed naturally. If needed, you can gently trim loose skin with scissors, but resist the urge to pull at it. - Research What’s Best for You
Not every peel is ideal for every skin type or concern. Take the time to consult a professional and ensure the VI Peel suits your goals.
Final Thoughts
I was thrilled with the results of my VI Precision Plus Peel. The investment was absolutely worth it, as it addressed my skin concerns and gave me a smoother, more even complexion. I’m already planning my next peel this winter and will space it about six weeks apart for optimal results.
If you’re considering a chemical peel, I highly recommend doing your research and consulting with a professional to find the best fit for your skin. Trust the process, and don’t forget that good skincare is a long-term investment in yourself!
Would I recommend the VI Precision Plus Peel? Absolutely!

Leave a comment